
If you’re into wholesome, homemade food, making your own yogurt is one of the most satisfying culinary projects you can take on. It’s surprisingly simple, cost-effective, and the taste? Absolutely divine!
Goat milk has a naturally creamy texture, tangy-sweet flavor, and is easier to digest than cow’s milk for many people. And thanks to the Instant Pot, making yogurt from it is easier than ever, even for beginners.
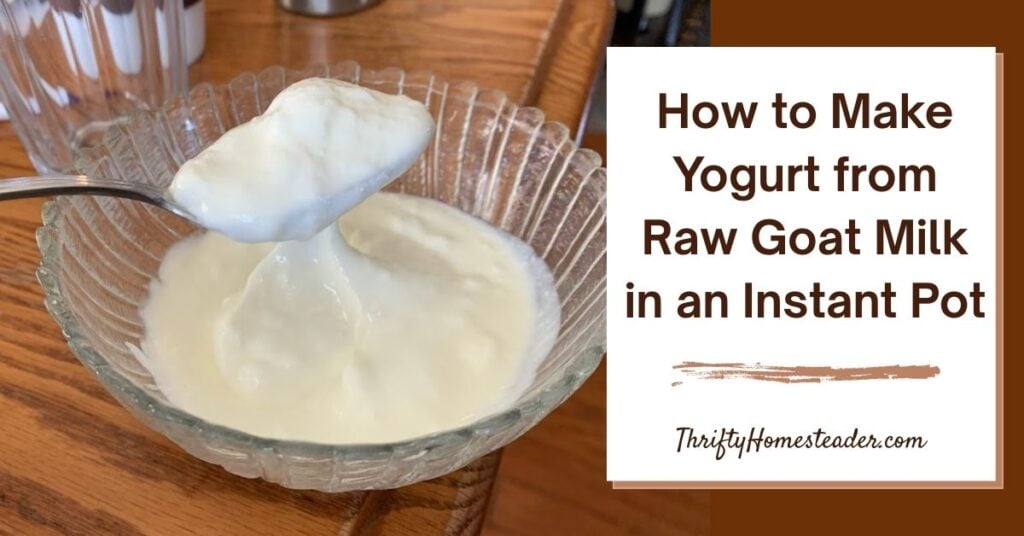
In this post, I’ll walk you through step-by-step how to make yogurt from raw goat milk using your Instant Pot, including important tips on safety, texture, and troubleshooting along the way.
Why Use Raw Goat Milk?
Before we jump into the process, let’s talk about the star ingredient: raw goat milk.
Goat milk is rich in nutrients, slightly tangy, and lower in lactose than cow’s milk. It contains smaller fat globules, which makes it naturally homogenized (the cream doesn’t separate easily), and some people find it gentler on the gut.
Raw goat milk means the milk hasn’t been pasteurized or homogenized—it’s as fresh and natural as it gets. While this milk is rich in natural enzymes and probiotics, raw milk also comes with a few safety considerations, especially when fermenting. That’s why we’ll pasteurize it ourselves before turning it into yogurt—unless you’re well-acquainted with raw fermentation techniques and have a herd you trust.
We pasteurize our milk before making yogurt so that we get consistent results. Although the naturally occurring bacteria in the milk may not be dangerous, it will fight with whatever culture you add, and it’s anybody’s guess which one will win. Some people have told me that their yogurt was thicker when they used raw milk, but our experience was the opposite — our yogurt was runnier when we used raw milk. It’s all a matter of what bacteria are on your farm and how they stack up to the yogurt culture that you add.
What You’ll Need
Equipment:
- Instant Pot with a Yogurt setting
- Cooking thermometer that reads between 80 to 130 degrees Fahrenheit
- Whisk or large spoon
- Glass jars or storage containers
- Cheesecloth (optional, for straining)
Ingredients:
- 1/2 gallon (8 cups) goat milk
- Commercial yogurt starter — or —
- 2 tablespoons plain yogurt with live cultures from a previous batch. Although some people have had success with store-bought yogurt, not all of it contains live cultures, so you could wind up wasting your milk if the cultures in the yogurt are not alive.)
- Optional: sweeteners, vanilla, or fruit for flavoring after culturing
Step-by-Step Instructions
Step 1: Prepare Your Tools
Before you start, make sure everything that touches your milk is very clean. Raw milk can harbor both good and bad bacteria, and we want to encourage only the good ones to grow.
- Wash your Instant Pot insert, whisk, and thermometer thoroughly.
- You can sanitize your tools by rinsing them with boiling water or running them through the dishwasher.
Step 2: Pasteurize the Goat Milk
This step is optional but highly recommended for safety and consistency.
- Pour the goat milk into the Instant Pot.
- Press the “Yogurt” button and then press again until the display says “BOIL”.
- It will beep and turn off when it reaches about 180°F (82°C).
Pro Tip: If you prefer raw yogurt, you can skip boiling, but use the freshest milk and be extra cautious with sanitation.
Step 3: Cool the Milk to 110°F
Bring the milk down to about 110°F (43°C) for culturing.
- Remove the insert and let it cool on the counter.
- Stir occasionally to prevent a skin from forming. If a skin has already formed, remove it because you can’t get it back to a liquid state again.
- Use a thermometer to monitor the temperature.
- Optional: place insert in a cold water bath in the sink to cool faster.
Step 4: Add the Yogurt Starter
- Mix yogurt starter according to manufacturer’s directions with a cup of the cooled milk.
- Whisk this mixture back into the rest of the milk in the pot.
Important: Ensure milk is not hotter than 125°F to avoid killing the live cultures.
Step 5: Incubate the Yogurt
- Place the insert back into the Instant Pot.
- Press the “Yogurt” button and make sure it is on the medium setting, which may read as “normal” on some Instant Pots. Use the + and – buttons to adjust the time.
- Cover with Instant Pot lid or glass lid (do not seal).
– Incubate 6–8 hours for mild yogurt.
– Incubate up to 12 hours for tangier yogurt.
Step 6: Chill and Set
- Remove the insert and check for a set texture.
- Let it cool for 30 minutes on the counter.
- Refrigerate for at least 4–6 hours to fully set.
Optional: taste a spoonful—it should be tangy and creamy.
Optional: Strain for Greek-Style Yogurt
- Line a colander with cheesecloth.
- Set it over a bowl and pour in the finished yogurt.
- Let it drain in the fridge for 2–6 hours.
Save the liquid whey for smoothies, baking, or feeding pigs and chickens!
Tips for Success
- Flavoring: Only add flavor after culturing. Mix in honey, vanilla, or fruit once chilled.
- Starter Yogurt: Make sure it’s plain, unsweetened, and contains live cultures.
- Clean Tools: Sanitation is key to success!
Troubleshooting
| Problem | Possible Cause | Fix |
|---|---|---|
| Yogurt didn’t set | Milk too hot when cultures added; or Instant Pot not hot enough during incubation period | Use a thermometer to be sure the temperature is correct at each stage; if temperature is incorrect, experiment with Instant Pot settings with only water to figure out which setting will hold the temperature around 110 degrees Fahrenheit |
| Yogurt didn’t set | Starter is weak or dead | Try a different starter; remember starter must be stored in the refrigerator or freezer, depending upon the manufacturer’s instructions |
| Too tangy | Incubated too long | Reduce time to 6–8 hours |
| Tastes like yogurt but too runny | Normal for lower fat milk | Strain for thicker yogurt or add gelatin; use Nigerian dwarf milk with a butterfat of 8% or more |
Why Make It Yourself?
Besides being delicious and satisfying, homemade yogurt has zero additives, lets you control the tartness, and gives you a deeper connection to your food. Plus, it’s a great way to use up extra milk if you have goats or access to a local farm.
And with the Instant Pot, it’s nearly foolproof.
Final Thoughts
Once you’ve made your first batch of yogurt with goat milk in the Instant Pot, you’ll never want to go back to store-bought again. It’s a beautiful blend of tradition and modern convenience—nourishing, tasty, and totally customizable.
Whether you enjoy it plain, with fruit and granola, or blended into smoothies, homemade goat milk yogurt is one of those kitchen staples that brings serious joy.
Have questions or want to share your experience? Drop a comment below—I’d love to hear how your yogurt-making adventures go!
Happy fermenting! 🐐🥣
Pin for later!


Great article! The other great reason to make your own yogurt in the Instant Pot is that you can reduce the amount of lactose by incubating the yogurt for longer periods of time. I used to incubate my yogurt for 16 hours or more.
Also, each week I just used 1/4 cup of my yogurt to start the next batch, so it was self-sustaining.
Thanks for sharing.
Great tip, especially for those who like a more tangy yogurt.
~Tammy
Hi. I never made yogurt before and would like to try. I just received an Instant Pot Duo Crisp with Ultimate Lid. Can I use Meyenberg whole goat milk. It is ultra pasteurized. If yes, then do I skip the “boiling/pasteurizing step and continue with the rest of the instructions in the Instant Pot.
Thanks, Mary Margaret
Hi Mary Margaret
Yes, you can use that and skip the pasteurization step. Do keep in mind that goat milk in general makes a thinner yogurt than cow milk. If you like it thicker, you can strain some of they whey out – that’s what I do 🙂
Tammy